Setting up my custom Ncurses Rsync client for the Thunar file manager
As someone that rsync’s files to-and-fro on a near daily basis, it quickly became a tedious practice, especially when multiple files and directories are involved.
There are some graphical utilities out there that could alleviate this, such as Grsync[1] and Unison[2]; but wouldn’t it be nice to just have the ability of doing this directly from your file manager? I think so.
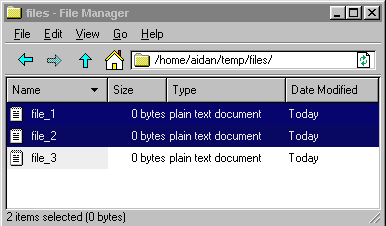
Thanks to Thunar and its “Custom Actions” feature and a little shell scripting, I’ve setup my own client of sorts. It isn’t comparable to the dedicated rsync GUI clients and I sure as heck wouldn’t trust it as part of my backup methodology, but it’s nice to have for a quick and simple means of copying a selection of files to a specified destination(s) from a point-and-click point of view.
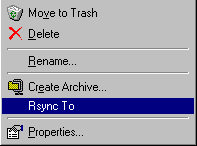
Simply laso them files, right click, then click “Rsync To” and they’re off!


How to setup
First off you’re going to want to download the shell script file. Click the following link to download.
• http://emhmki.org/guides/file_sharing/files/rsync_utilSave it somewhere on your file system that would make it available in the $PATH environment variable. Don't forget to apply the execution bit to the file so that you're able to run it.
chmod +x rsync_util
Create a directory and configuration file for rsync_util. The configuration file will contain a list of your preferred destinations and file path directories.
                  mkdir -p ~/.config/rsync-client


                  touch ~/.config/rsync-client/client.conf
The following is an example of the configuration file contents.
                  cloud.emhmki.org /home/user/sync_dir/


                  192.168.0.2 /home/john/my files/


                  192.168.0.1 /media/file share/projects/


                  #192.168.0.3 /media/file-share/archive/
| Note |
|
Now you'll need to setup Thunar's custom actions.
- From the Thunar file manager, click "Edit" from the menu bar, then "Configure custom actions."
- Add a new action.
- You can name your action whatever you would like; I've named mine as "Rsync To."
- In the command section, add the following line:
-
xterm -e rsync_util "%F"
- Click on the "Appearance Conditions" tab and check each box for each file type you would like for the action to be available for. For myself, I’ve enabled the action for all file types.
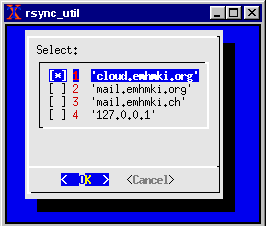
At this point, you should be able to right click any file and select your custom action. If you have XTerm installed, the rsync_util script visible to $PATH, a complete configuration file, and the execute permission bit applied to the script file, then you should see an XTerm window with an Ncurses interface spawn.
You can use your mouse or keyboard arrows to select your preferred destination(s).
Conclusion
You can modify the script more to your liking if it doesn’t exactly meet your needs. I’ve included some comments in the top of the script that could be tweaked.
You should bare in mind that shell scripts like this can be finicky and can flake out when you might need it most. This isn’t intended as a backup tool, but just a point-and-click utility for copying files to a remote server from your file manager.
If you have any recommendations I could make to improve the script, then let me know!
References
1. http://www.opbyte.it/grsync/
2. https://www.cis.upenn.edu/~bcpierce/unison/
[Return to top]


