Traditional desktop setup for XFCE

XFCE is by far my favourite desktop. Unlike most other desktop environments, configuring the desktop layout in XFCE is intuitively direct and flexible. If you are like myself and prefer a more traditional layout, then typically all you really need to do is move the taskbar (known as the panelbar) to the bottom of the screen and then presto! You'll have a traditional desktop interface with XFCE.
However some operating systems may take it upon themselves to deviate from this configuration. The following steps will guide you through creating a traditional XFCE panelbar from the ground up.
Configuring panel
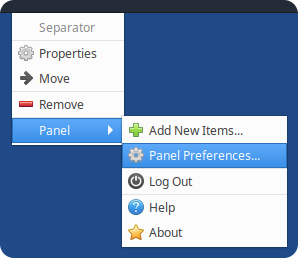
Right click an empty space on the panel, then select "Panel," and "Panel Preferences" from the right-click menu.
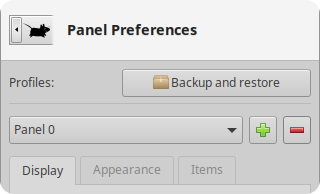
Adjust your current panel preferences to the following:
                Mode: Horizontal


                Lock panel: disable


                Automatically hide the panel: Never


                Don't reserve space on the borders: disable


                Row size (pixels): 27


                Number of rows: 1


                Length (%): 100


                Automatically increase the length: enable
Now click onto the Appearance tab. and adjust the preferences to the following:
                Style: None (use system style)


                Icons - Adjust size automatically: disable


                Fixed icon sizes (pixels): 16


                Opacity - Enter: 100


                Opacity - Leave: 100
Click onto the Items tab and remove all of the current items. Once you've cleared out the items, re-add them back in the following order:
- Whisker menu or Application menu
- Launcher
- Launcher
- Launcher
- Show Desktop
- Window Buttons
- Separator
- Status Notifier Plugin
- Notification Area
- Notification Plugin
- PulseAudio Plugin
- Clock
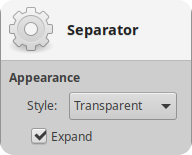
From your item list, double click on the separator to open the edit menu. From the edit menu adjust the style to "Transparent" and insert a check for "Expand."
[Return to top]
Configuring system tray icon plugins
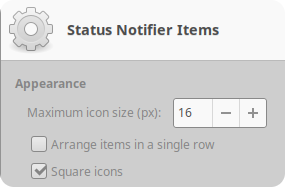
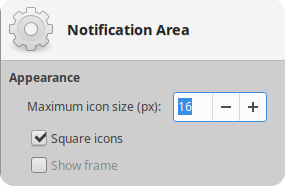
If you look carefully, you might notice that the system tray icons appear inconsistently larger and oddly spaced compared to other icons on the panelbar. Apply the following to both the "Status Notifier Plugin" and "Notification Area" plugin from your panel items list:
                Maximum icon size (px): 16


                Square icons: enable


                Show frame: disable
[Return to top]
Configuring panel launcher
You can double click each launcher from the item list and modify them to launch any specific application or script that you would like. From the launcher window, click onto the "Add a new empty item" button.

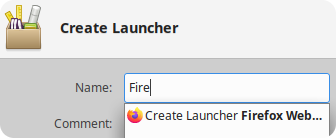
From the Create Launcher window, you can type in the name of an application and it will show up as an available choice to pre-populate the rest of the launcher options.
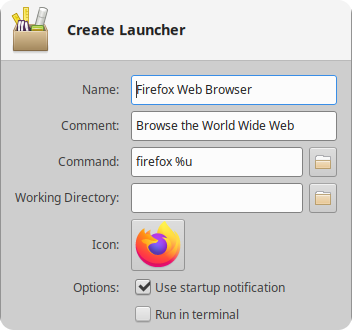
If the application you would like to add to the panel launcher isn't available from the menu as you type in its name, then you may have to manually add it.
To manually add an application:
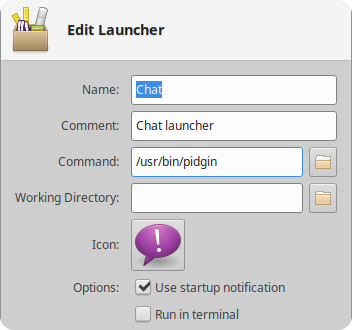
- Fill-in any name you want for the application launcher.
- You can add a comment in the comment section if you would like; it will appear when hovering over the launcher icon with your cursor as a tooltip.
- The command section will require either the application name or its path on the filesystem. If the application's executable name is not present in your environment PATH, then you will have to specify the complete file path.
[Return to top]
